“You can’t wait for inspiration, you have to go after it with a club”
– Jack London, American author, journalist, and social activist
Lettuce seeds are small—very small—and planting them is a time-consuming, meticulous process, Each tray we plant has 250 tiny holes that each require one seed. So in February when Jon and I looked at the task of planting hundreds of trays and forty types of greens, we knew it was time to get creative.
What we needed was a machine that could tap each seed into a hole at the same exact time, and our only option was to build one. So we did.
We designed a wooden box with 250 holes that matched the ones in the tray, and then we added a suction device that would hold the seeds in place. Using a dibble board (indent maker), we marked each hole in the soil.
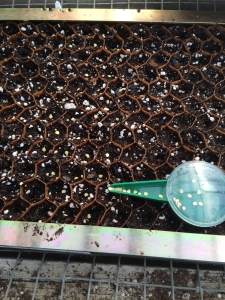
When it came time to test, we crossed our fingers and flipped the vacuum switch. Our invention suctioned all 250 seeds into their allotted spaces. We placed the box over the tray and turned the suction off. As hoped, each seed dropped into its respective hole. We’d done it.
If you’re interested in building your own (or simply like seeing how things work), here are step by step instructions. And, if you need proof it works, visit us on Saturday’s at the South Portland Farmer’s Market for a look at the delicious results.
The Method to our Madness
What you’ll need
3-4 pieces of cheap softwood
1 small piece of ¼ inch plywood
Measuring tape
Router
Thumbtacks
Drill
Wood glue
Dibble board
Shop-vac
Instructions:
- Measure your tray and write down the measurements
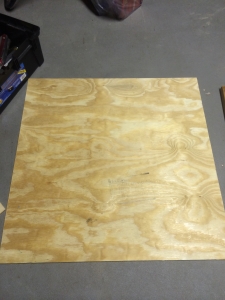
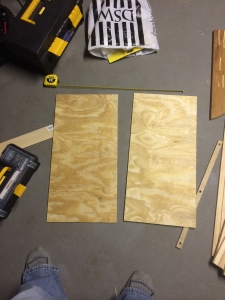
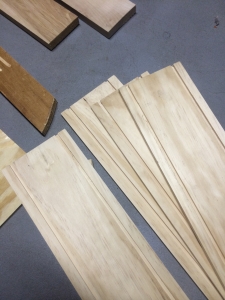
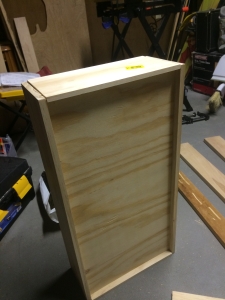
- Using a router, cut a ¼ inch groove lengthwise along the top and bottom of your softwood sides. The groove will allow for the plywood top and bottom pieces to slide in and form the box. Measure and cut the softwood sides to the exact length and width of your tray.
- Cross your fingers and hope the plywood slides fit into the sides without cracking. Once all four sides are on, take it apart, use a little wood glue and clamp it together. Now you’ve got your box.
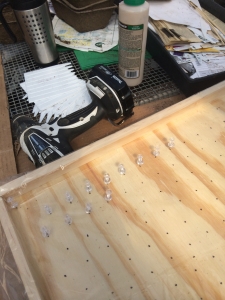
- Drill the holes where the seed will rest once the vacuum is turned on. We found that the best way to do this is to line up your plug/tray and, with the smallest drill bit you have, drill right through each cell. We used a piece of plastic as our template, but the plastic moved around a bit.
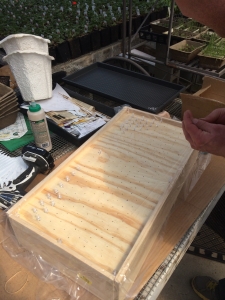
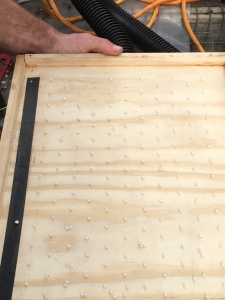
- Once the seed-hole is drilled, you’ll need to drill a larger circular hole in the end of the softwood side for the vacuum hose to be inserted. We used a shopvac and didn’t have any problems getting a secure, flush fit. In the picture below, you can see the black hose of the shopvac. We used pelleted lettuce seeds, spread them over the box and turned on the shopvac. Each seed found a resting place in the hole we drilled.
- To prepare the tray for planting, use a dibble board that makes a little hole in the dirt, rather than doing this one at a time by hand.
- While the vacuum is on, flip the box upside down so that it is over the tray, and then turn the vacuum off. The seeds should fall into each hole. Cover the seeds with a little dirt and examine each lug to ensure the seeds went exactly where they were supposed to go.
[fusion_builder_container hundred_percent=”yes” overflow=”visible”][fusion_builder_row][fusion_builder_column type=”1_1″ background_position=”left top” background_color=”” border_size=”” border_color=”” border_style=”solid” spacing=”yes” background_image=”” background_repeat=”no-repeat” padding=”” margin_top=”0px” margin_bottom=”0px” class=”” id=”” animation_type=”” animation_speed=”0.3″ animation_direction=”left” hide_on_mobile=”no” center_content=”no” min_height=”none”]
[/fusion_builder_column][fusion_builder_column type=”1_1″ background_position=”left top” background_color=”” border_size=”” border_color=”” border_style=”solid” spacing=”yes” background_image=”” background_repeat=”no-repeat” padding=”” margin_top=”0px” margin_bottom=”0px” class=”” id=”” animation_type=”” animation_speed=”0.3″ animation_direction=”left” hide_on_mobile=”no” center_content=”no” min_height=”none”]
[/fusion_builder_column][fusion_builder_column type=”1_1″ background_position=”left top” background_color=”” border_size=”” border_color=”” border_style=”solid” spacing=”yes” background_image=”” background_repeat=”no-repeat” padding=”” margin_top=”0px” margin_bottom=”0px” class=”” id=”” animation_type=”” animation_speed=”0.3″ animation_direction=”left” hide_on_mobile=”no” center_content=”no” min_height=”none”]
[/fusion_builder_column][fusion_builder_column type=”1_1″ background_position=”left top” background_color=”” border_size=”” border_color=”” border_style=”solid” spacing=”yes” background_image=”” background_repeat=”no-repeat” padding=”” margin_top=”0px” margin_bottom=”0px” class=”” id=”” animation_type=”” animation_speed=”0.3″ animation_direction=”left” hide_on_mobile=”no” center_content=”no” min_height=”none”]
[/fusion_builder_column][fusion_builder_column type=”1_1″ background_position=”left top” background_color=”” border_size=”” border_color=”” border_style=”solid” spacing=”yes” background_image=”” background_repeat=”no-repeat” padding=”” margin_top=”0px” margin_bottom=”0px” class=”” id=”” animation_type=”” animation_speed=”0.3″ animation_direction=”left” hide_on_mobile=”no” center_content=”no” min_height=”none”]
[/fusion_builder_column][fusion_builder_column type=”1_1″ background_position=”left top” background_color=”” border_size=”” border_color=”” border_style=”solid” spacing=”yes” background_image=”” background_repeat=”no-repeat” padding=”” margin_top=”0px” margin_bottom=”0px” class=”” id=”” animation_type=”” animation_speed=”0.3″ animation_direction=”left” hide_on_mobile=”no” center_content=”no” min_height=”none”]
[/fusion_builder_column][fusion_builder_column type=”1_1″ background_position=”left top” background_color=”” border_size=”” border_color=”” border_style=”solid” spacing=”yes” background_image=”” background_repeat=”no-repeat” padding=”” margin_top=”0px” margin_bottom=”0px” class=”” id=”” animation_type=”” animation_speed=”0.3″ animation_direction=”left” hide_on_mobile=”no” center_content=”no” min_height=”none”]
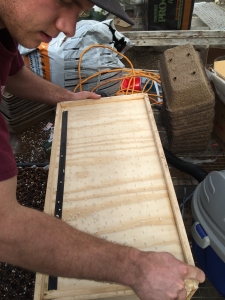
Notice under Jon’s finger is a little channel that allows for excess seeds to be saved for later. The black tape is to cover a line of holes we missed the mark on.
[/fusion_builder_column][fusion_builder_column type=”1_1″ background_position=”left top” background_color=”” border_size=”” border_color=”” border_style=”solid” spacing=”yes” background_image=”” background_repeat=”no-repeat” padding=”” margin_top=”0px” margin_bottom=”0px” class=”” id=”” animation_type=”” animation_speed=”0.3″ animation_direction=”left” hide_on_mobile=”no” center_content=”no” min_height=”none”]
This system has saved us a tremendous amount of time.
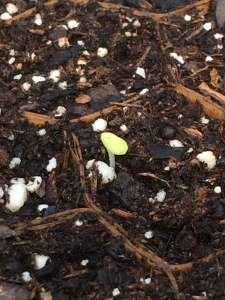
And that is how we arrived at our very first seedling earlier this spring.
[/fusion_builder_column][fusion_builder_column type=”1_1″ background_position=”left top” background_color=”” border_size=”” border_color=”” border_style=”solid” spacing=”yes” background_image=”” background_repeat=”no-repeat” padding=”” margin_top=”0px” margin_bottom=”0px” class=”” id=”” animation_type=”” animation_speed=”0.3″ animation_direction=”left” hide_on_mobile=”no” center_content=”no” min_height=”none”]
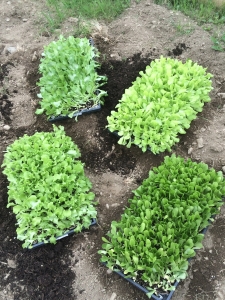
And those sprouts later turned into this…
[/fusion_builder_column][/fusion_builder_row][/fusion_builder_container]

That is impressive! You guys are very clever!